
Everyone who updates your website should have their own login. It’s safer than sharing one, and you can remove access when someone leaves.
Adding a user
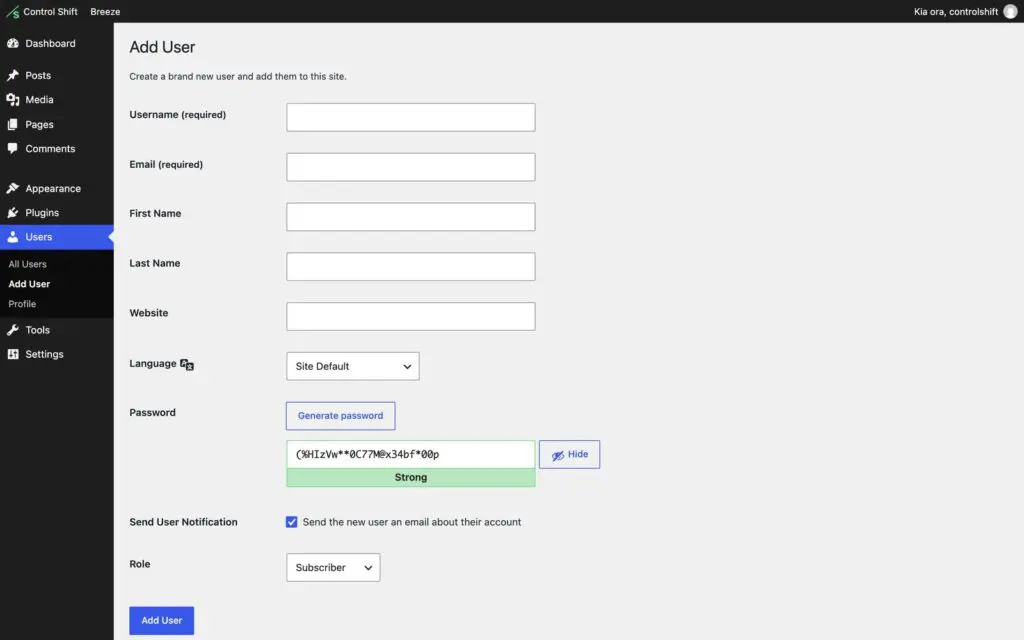
- Go to Users and click Add User.
- Enter a username and their email address. Their name is optional.
- Leave Send the new user an email about their account ticked, so they can set their own password.
- Choose a Role (see below).
- Click Add User.
Which role should they have?
- Administrator: can change everything, including plugins and settings. Keep this to one or two trusted people.
- Editor: can write, edit and publish all pages and posts. The right choice for most staff who update the website.
- Author: can write and publish their own posts only.
- Contributor: can write posts, but someone else has to publish them.
- Subscriber: can only manage their own profile.
If your website has an online store, you may also see Shop Manager, which is for people who look after orders and products.
When someone leaves
Go to Users, hover over their name and click Delete. WordPress will ask who should own their pages and posts, so nothing is lost. Removing old logins is one of the simplest ways to keep your website secure.